The Ultimate 4 Day Joshua Tree Itinerary

Having been to Joshua Tree three times over the last decade, I feel pretty confident in saying that this is the ultimate 4 day Joshua Tree itinerary. This 4 day guide to exploring Joshua Tree National Park is perfect for first time visitors to the park, since it takes you to many of the iconic spots in the national park, as well as some personal favorite trails.
Along your trip you’ll see everything from the iconic cholla cactus garden and heart rock, to the unique ‘hall of horrors.’ I also spotlight some of the less popular trails in the park! The itinerary includes a mix of longer and shorter hikes within the national park, so it’s best suited for people who hike somewhat regularly. However, you can easily adapt this itinerary to your fitness and comfort level.
Read below for our full 4 day Joshua Tree itinerary, along with information about when to visit the park and where to stay. You can find even more Joshua Tree National Park resources on our Instagram @gwynandami, so follow along for more!

Welcome!
We’re Gwyn and Ami. Based in Spokane, Washington, we’re your guides to the Pacific Northwest and beyond!
We’re adventure travel experts, and our blog is all about helping you find the best hikes, weekend getaways, and national park adventures in the United States and abroad. You can find more on Instagram @gwynandami.
4 day Joshua Tree Itinerary

When to visit Joshua Tree National Park
When NOT to visit Joshua Tree

Before we talk about when to visit Joshua Tree, let’s talk about when NOT to visit.
If you want to see the sights and hike in the desert you probably don’t want to encounter sweltering, and dangerous, heat. The average high temperatures June, July, August, and September are between 90-100 degrees, so I recommend avoiding visiting during those months if you can.
October and May are the ‘shoulder season’ in the park, where averages are in the low to mid 80s, which can make for a lovely trip! Consider those months as a good option, but have flexible plans if you’re aiming to do long hikes and the weather ends up being unseasonably hot.
The best seasons for visiting Joshua Tree

So, what are the BEST seasons to visit Joshua Tree National Park? I think winter and early spring take the cake! I have been to Joshua Tree National Park in winter and spring and highly recommend both seasons! See below for why I love each of these seasons in the park.
Winter is a relatively peaceful time to visit the park. In terms of temperature, highs are around 60 degrees, with lows typically dropping into the mid-30s. Thus, you can expect cold nights and cool days – you’re unlikely to experience hot temperatures. The park occasionally gets rain and snow during this time of year, which makes for a truly unique and beautiful experience in Joshua Tree. I’ve been lucky enough to experience both rain and snow in the park!


Spring is a unique and beautiful season in Joshua Tree, and is my favorite time of year to visit! During spring Joshua Tree comes alive with beautiful wildflowers, making for a unique sight in the desert. Average highs in March and April are in the 70s, and lows are in the 40s, which means lovely warm days and cool (cold-ish) nights.
Note that historically, the park is busiest between November and April. March and April having the most visitors. You can dig into the monthly visitation data here. Additionally, weather and conditions can vary significantly depending what elevation you plan to explore. If you’re visiting the mountains in the park you’ll want to do some more in-depth research into weather conditions there.
Where to stay in Joshua Tree National Park

Unique hotel stays near Joshua Tree National Park
There are a lot of unique accommodation options in and around Joshua Tree National Park. A few hotels we recommend are listed below.
- Pioneertown Motel – a beautiful property with polished rooms in a unique desert setting!
- Field Station Joshua Tree – this polished and modern property was built with adventure in mind! Bring your gear (rooms have a ton of storage for all your adventure gear!), get dusty exploring, and then relax in the pool after a long day in the desert.
- Super 8 Yucca Valley – This is a relatively standard hotel with a lot of desert charm. Expect basic amenities in a convenient location.
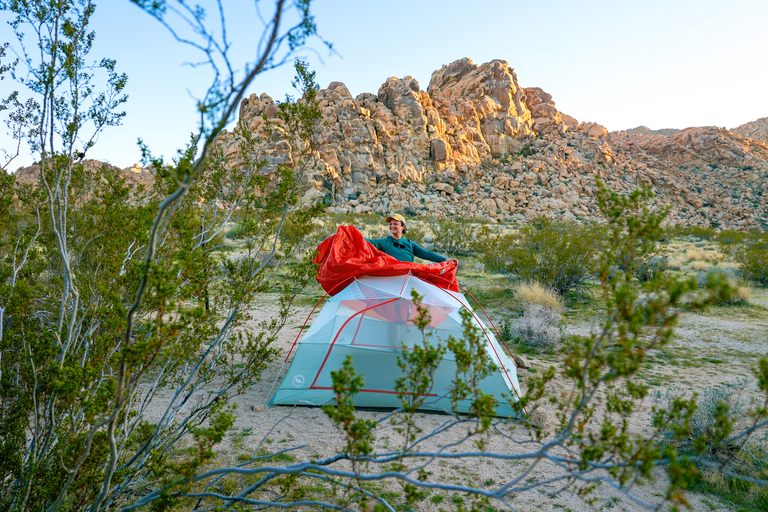
Backpacking and camping in Joshua Tree National Park

In addition to unique hotel stays in the towns outside of Joshua Tree, you can also camp and backpack in the national park!
Campsites in the national park will typically run you $20-$25 per night, and the majority of the 500 sites in the park have to be booked in advance online. There are, however, several spots where you can get walk up sites when available. Just note that those sites are competitive, and difficult to secure during the busy season! There is also BLM land north and south of the park where you can camp for free. However, it’s a bit of a drive. Camping is a great option for having a unique and memory experience in the park
Backpacking is also a unique and memorable way to experience the national park! Backpacking permits are the cheapest option for accommodations, with permits costing about $6. We backpacked the Boy Scout Trail in Joshua Tree in spring and highly recommend it. It’s beginner friendly, and is a unique way to experience Joshua Tree National Park! You can read about our backpacking trip here, which includes all the information you need on the trail, permits, and gear you’ll need.
Shop our Backpacking gear
Curious about what backpacking gear we use and love? Check out our full 2025 backpacking gear guide and get access to our FREE downloadable backpacking gear checklist below!

The ultimate 4 day Joshua Tree Itinerary
Below you’ll find the ultimate 4 day Joshua Tree itinerary! Personally, I find 3-4 days to be the perfect amount of time to see most of the highlights in Joshua Tree National Park while still enjoying some longer hikes. If you’re super short on time you could easily turn days 2 and 3 into a two day weekend itinerary for Joshua Tree National Park.
This itinerary takes you from the northern sections of the park to the south, so consider this when choosing your lodging options in and around the park.
Day 1 in Joshua Tree
Hike Willow Hole / Boy Scout Trail

Start your Joshua Tree trip out with an epic hike close to the park’s west entrance station. Pack a picnic lunch and enjoy the stunning 7 mile (round trip) hike to Willow Hole, which is a unique oasis with cottonwoods, willows, and (sometimes) water.


This hike starts along the southern stretch of the Boy Scout Trail, which is beautiful and one of my favorite stretches of trail in the park! Eventually you’ll take a right hand fork along the trail to get to Willow Hole. Along the way you’ll see lots of iconic Joshua trees, and expansive views of the surrounding desert. You’ll also pass through a unique wash, with beautiful rock walls carved by water. This hike ultimately takes you up to the Wonderland of Rocks, which is a stunning backcountry area in the national park.


If you can, I recommend arriving at the trailhead at sunrise, like we did. You might be treated to a beautiful sunrise, and you’ll also beat the crowds! Although this hike isn’t overly crowded, you will encounter more people the later in the day you start.
We have also backpacked along the northern section of the Boy Scout Trail, which I highly recommend. You can read more about our Joshua Tree backpacking trip here.
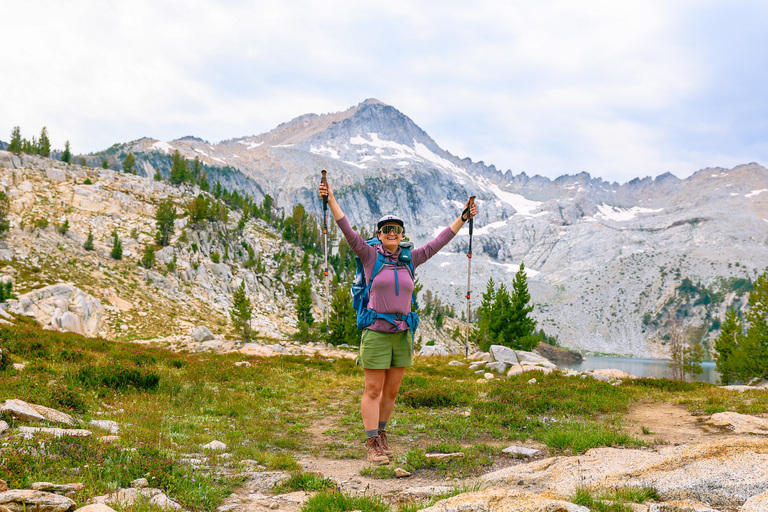
Hiking essentials checklist
Below are our 6 major hiking essentials, which we almost always have with us on the trail!
- America the Beautiful Pass. An annual America the Beautiful pass covers your entrance fees at all national parks. It also covers fees at other federally managed public lands, such as forest service and BLM sites. This pass is a great investment for people who love national parks and outdoor recreation!
- Good hiking boots. Waterproof boots with good traction are essential, and a quality pair can last for years. We highly recommend Lowa’s Renegade hiking boots.
- Water and a water filter. We love the Katadyn BeFree 1.0 Liter Filter Bottle for water filtration, and usually use a Nalgene water bottle or a HydraPak Water Reservoir for water storage.
- Sun protection. We recommend the Sahara Sun Hoodie (for women and men), which is a sun shirt that offers UPF 50+ sun protection. For sunscreen we like Dermatone’s sport sunscreen and Skin Protector Balm (for winter).
- A headlamp. The Black Diamond Storm 400 Rechargeable Headlamp is lightweight, compact, waterproof, and USB rechargeable.
- A comfortable day pack. We recommend the REI Trail 25 (unisex), the Gregory Juno daypack for women, or the Gregory Inertia daypack for men.
Visit Joshua Tree’s Hall of Horrors

The Hall of Horrors is a fun and unique area of Joshua Tree, and is worth a quick stop after a long day of hiking! This area features a large rock formation and lots of Joshua trees. However, the real gem is the unique slot canyon that runs through the big rock formation. If you can find it, this area makes for some unique photo ops! Use this guide to help you find the Hall of Horrors slot canyon. The rocks are right next to the parking lot, so you don’t have to hike much to experience this spot.


This area is popular, so I recommend visiting early or late in the day when possible.
Day 2 in Joshua Tree
Sunrise hike at Fortynine Palms Oasis Trail

Start your second day in Joshua Tree with a short hike along the Fortynine Palms Oasis Trail. This 3 mile (out and back) hike takes you to a beautiful palm oasis. This is one of only 5 palm oases in Joshua Tree National Park! The hike itself takes you past some beautiful rock formations, and to a beautiful palm oasis surrounded by dramatic rocks.
Leave no trace tip: please respect this environment by not entering the oasis, which is an important habitat for animals and plants, and a unique refuge with water. Foot traffic can damage the area, destroy plants, and scare away animals. It’s important that we work together to protect this fragile environment!


It’s best to visit the fortynine palms oasis at sunrise because this hike gets BUSY! However, sunset is also a good time to go. You will get the best lighting for pictures early or late in the day, when the sun isn’t as harsh.

Shop my camera gear!
Photography takes skill, but good gear doesn’t hurt... Shop my full camera gear setup on my photography gear guide for travel content creators.
Hike the Split Rock Loop Trail

Next, head to the Split Rock Loop Trail, which is located in the center of Joshua Tree National Park’s northern section. The trail’s namesake “split rock” is a big, split rock right off the parking lot. It’s fun to see! However, I recommend doing the full loop hike, which is 2.5 miles and relatively flat. Split Rock Loop Trail is actually one of my favorite trails in Joshua Tree National Park. It’s not very busy, and I think the desert plants, hills, and rocks here are especially beautiful.


The trailhead at split rock has picnic areas, so this is a great place to enjoy lunch before your hike.
Visit Skull Rock and Hike The Discovery Trail

End your day at Skull Rock and the Discovery Trail! These popular locations don’t require a lot of hiking, and they have a big payoff.
Start your adventure at skull rock, which is a popular rock formation in Joshua Tree that looks like a skull. It’s right off the road so you won’t need to hike to it, but you might encounter challenges parking since the area is so popular. Take in the views, snap some photos, and then head across the street to the Discovery Trail!
Next, take a stroll along the Discovery Trail! The Discovery Trail is a short and sweet 0.7 mile (out and back) trail that has educational signage along it. It can be crowded, but it’s fun, pretty, and lets you learn about the geology, history, plants, and animals in the park!


If you have time and energy I recommend adding a quick stop to Face Rock, which is a unique rock formation that looks like the profile of a face. It’s located a short walk off the Discovery Trail, and is well marked on maps! I actually think face rock is cooler than skull rock, and as you can see below in the photos, it’s much less crowded! Can you see the skull and face in the rocks?


Want more? Consider adding on the Barker Dam Trail, which is very popular. I didn’t enjoy that trail as much as I thought I would, but many people rave about it and it’s an iconic location to see, especially during your first trip to Joshua Tree.
Shop our hiking gear!
Not sure what gear you need to pack for your next epic hike? Check out our full 2025 hiking gear guide, which includes the best hiking gear for summer, winter, and year-round hiking.

Day 3 in Joshua Tree
Sunrise at the Cholla Cactus Garden

It’s time to start heading south! The previous two days had you exploring the northern sections of Joshua Tree, and it’s time to check out the southern section of the park. As you drive from north to south note how the landscape changes. The Joshua trees will become sparser and then disappear from the landscape entirely. The southern part of the park is in the Colorado desert while the northern part of the park (where the Joshua trees live) is in the Mojave desert. If you’re interested, you can read more about the two distinct desert ecosystems of Joshua Tree National Park.
Start your day off with a sunrise stop at the Cholla Cactus Garden. You can do a short 0.25 mile hike here and enjoy all the teddybear cholla cacti that grow in this part of the park. Just don’t touch them, as they’re sharp and hard to remove from skin and clothing. Watch where you step, as you’ll see small pieces of cactus, known as “jumping cholla,” everywhere! In spring, when the cacti are in bloom, you’ll encounter a lot of bees.


It’s my humble opinion that sunrise and sunset are the ONLY times you should be visiting the Cholla Garden, because the lighting is pure magic! It’s also less crowded than the middle of the day.
Hike to Heart Rock and Arch Rock

Next, do one of my favorite hikes in Joshua Tree – the Heart Rock and Arch Rock loop! This chill 1.6 mile (round trip) hike takes you to a large rock arch, as well as an iconic heart shaped granite boulder. This area of the park doesn’t have many Joshua trees, but I think it makes up for it with some really cool and unique rocks!


I recommend exploring this area a bit, since there are some other cool rocks and photo ops along this trail.
Sunset hike to Mastodon Peak

End your day with a 3 mile sunset hike to Mastodon Peak. The end of the hike, should you choose to go to the top, requires some mild scrambling. Either way, however, you’ll get fantastic views of the southern portion of the national park.


Day 4 in Joshua Tree
Hike to the Lost Palm Oasis

End your trip to Joshua Tree with an EPIC hike to the Lost Palm Oasis. This is a popular backpacking route, and at 7.5 miles (round trip) it’s a longer hike… but it’s worth it! The hike is located in the southeastern portion of Joshua Tree National Park, and you won’t encounter too many people. When I hiked here in spring 2024 I felt like I had stepped onto another planet. This is truly a unique and special part of the national park.


Along the hike you’ll pass by unique rock formations, mountains, and lots of desert plants. It looks very different from the northern sections of the park! At the end of the hike you’ll arrive at Lost Palms Canyon, where you’ll find beautiful fan palm trees that currently thrive due to a rare permanent water source. If you’re lucky you may also see some desert wildlife.
I hope you found this 4 day Joshua Tree itinerary helpful! You can find more California itineraries here, and more USA national park guides here. You can also follow along on Instagram @gwynandami for more travel itineraries, epic hikes, and gear recommendations!
Welcome to our blog! We’re Gwyn and Ami, the couple behind the Instagram @gwynandami. We’re USA travel experts, and we’ve road tripped all over the west exploring the best destinations, hikes, and national parks. We put together epic travel itineraries to make planning your next adventure easier! You can learn more about us here.